

There’s something special about making homemade ice cream, and this Ice Cream in a Bag Recipe is such a fun, and super easy, way to do it. This recipe gives you perfectly creamy vanilla ice cream in less than 15 minutes, with only a few easy ingredients, and no ice cream maker needed! It’s such a fun hands-on activity that the kids will love in the summer time!

If you’ve never made ice cream in a bag, you are in for a serious treat. It’s such a fun DIY dessert that is part science experience, and part summertime magic. You only need 4 ingredients, a couple zip-top bags, salt, and a lot of ice! Shake it all up and you’ll have a sweet, creamy treat that’s ready in just a few minutes!
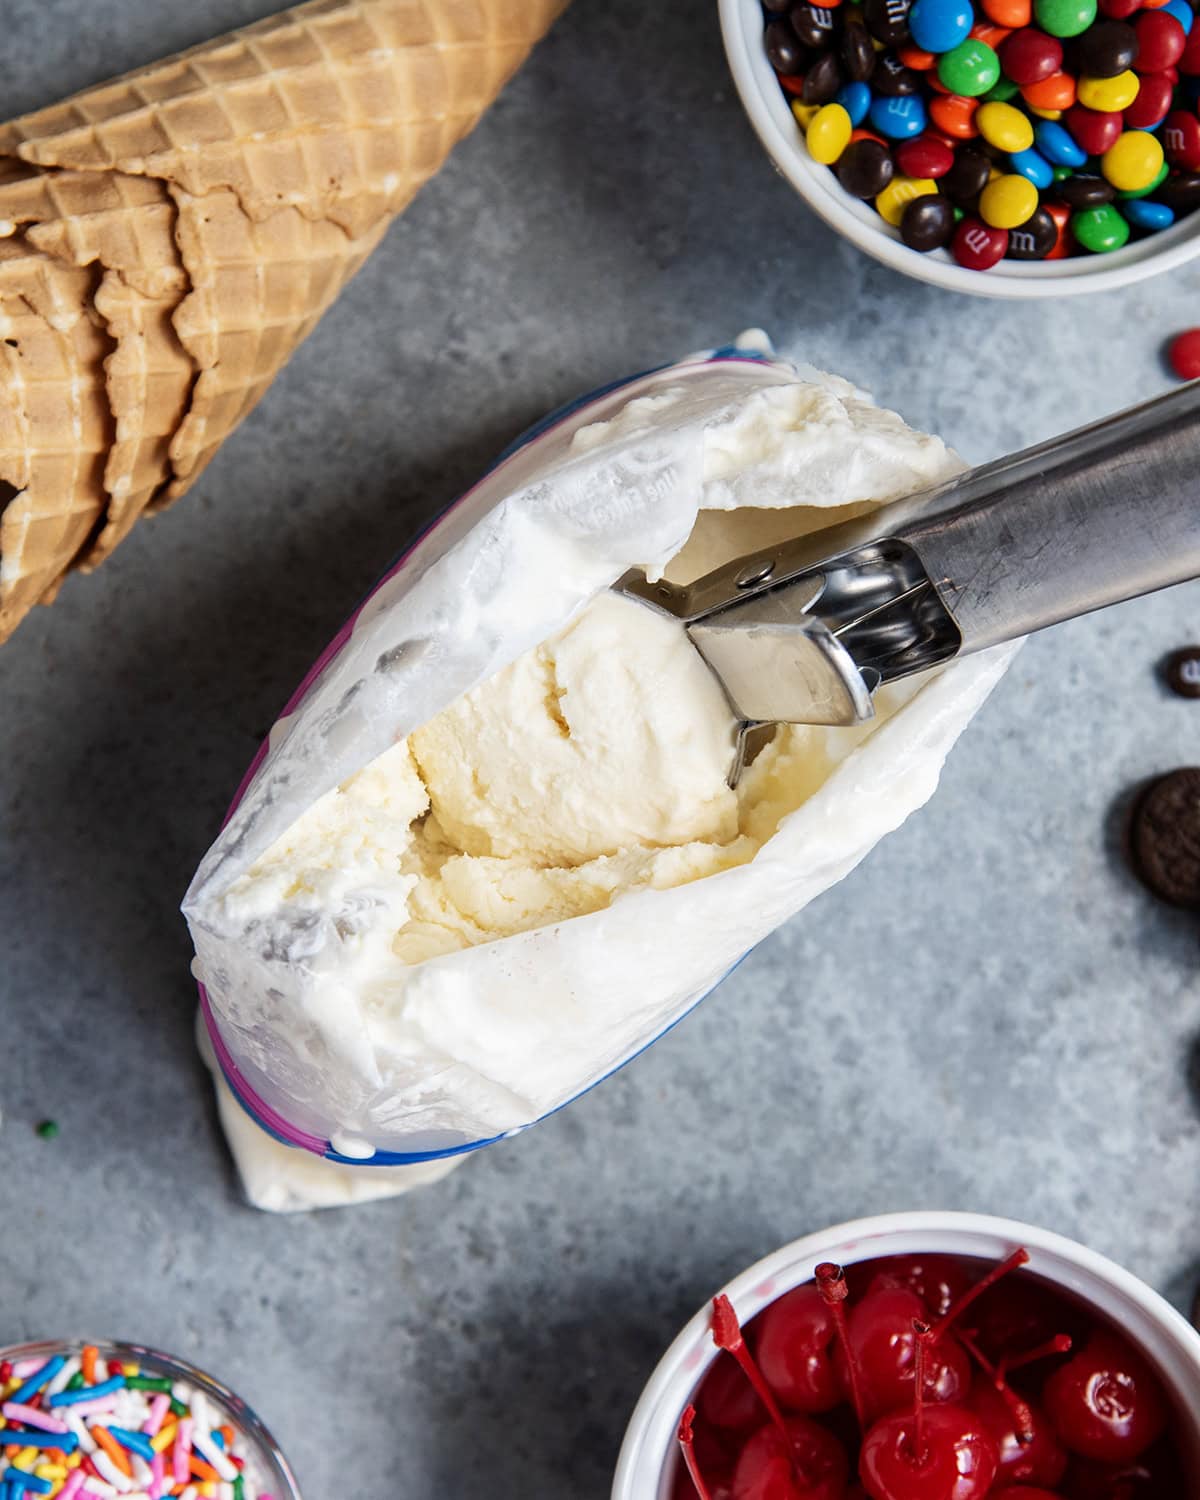
We’ve got several other ice cream recipes on our site, but many of them require an ice cream maker. This is a fun way to make homemade ice cream without a machine, and perfect for getting the kids involved. This recipe makes a basic vanilla base ice cream that is perfect for adding your favorite toppings, like Oreos, sprinkles, chocolate syrup, or m&ms.
Now, this ice cream isn’t the BEST vanilla ice cream you’ll make. It’s good, but its mostly fun because it’s a cool experiment. Other favorite ice cream recipes without a machine are our No Churn Chocolate Peanut Butter Cup Ice Cream, Key Lime Pie Ice Cream, Mint Chocolate Chip Ice Cream, and Cookie Dough Ice Cream.

Why you’ll Love it!
- Done in 15 minutes: Add the ingredients to a bag, cover in ice and salt and shake it all up.
- Fun Summer Project: You can teach the kids science, make memories, and eat ice cream all at the same time!
- Simple Ingredients: Only 3 ingredients for your ice cream base, and a couple house hold supplies and you’re making ice cream!
- Customizable Flavors: Add different extracts, chocolate syrup, or different toppings to your ice cream to make your favorite flavors.

How this Works:
When salt is added to ice, it lowers the freezing temperature of the ice, making the mixture colder than just ice. As you shake the bags the super cold salty ice draws the heat out of the cream mixture, freezing it quickly.
Shaking the bags helps the mixture freeze evenly, while also adding in air to give it a creamy texture. We are basically mimicking an ice cream maker churning the ice cream around with the ice + salt freezing it like your ice cream maker. Just with our hands and a couple zip-top bags instead!

Ingredients Needed
This is a quick overview of the ingredients you’ll need for this Ice Cream in a Bag Recipe. Specific measurements and full recipe instructions are in the printable recipe card below.
- Half and Half: You can also use a mix of cream and milk, or even just milk, but to keep it easy and creamy, I like half and half.
- Granulated Sugar: Sweetens the ice cream
- Vanilla Extract: You pure vanilla extract, not imitation for that classic vanilla flavor
- Gallon Sized Ziploc Bags: You will need two heavy duty bags, one to hold the ice cream, which goes inside the other bag that is filled with the ice and salt. I recommend freezer safe, heavy duty bags to prevent the ice cream from leaking.
- Ice: Regular ice from your ice maker works great, or even better buy a bag of big ice pieces from the store.
- Salt: Rock salt works best for lowering the temperature of the ice quickly, but even regular table salt will work.

How to make Ice Cream in a Bag
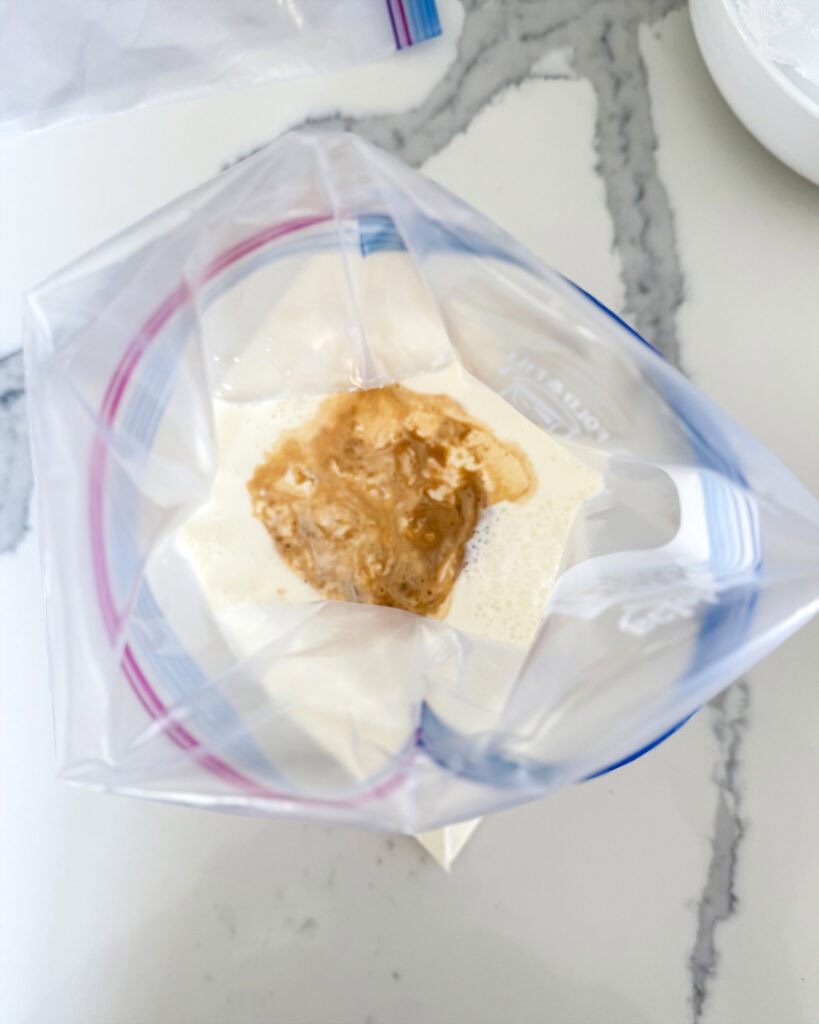
Step 1: Mix the Ice Cream Ingredients. Add the half and half, sugar, and vanilla in a zip-top bag. Squish it all together for a couple minutes. Seal the bag tightly to get out as much of the air as you can. (You can double bag here if you are worried).
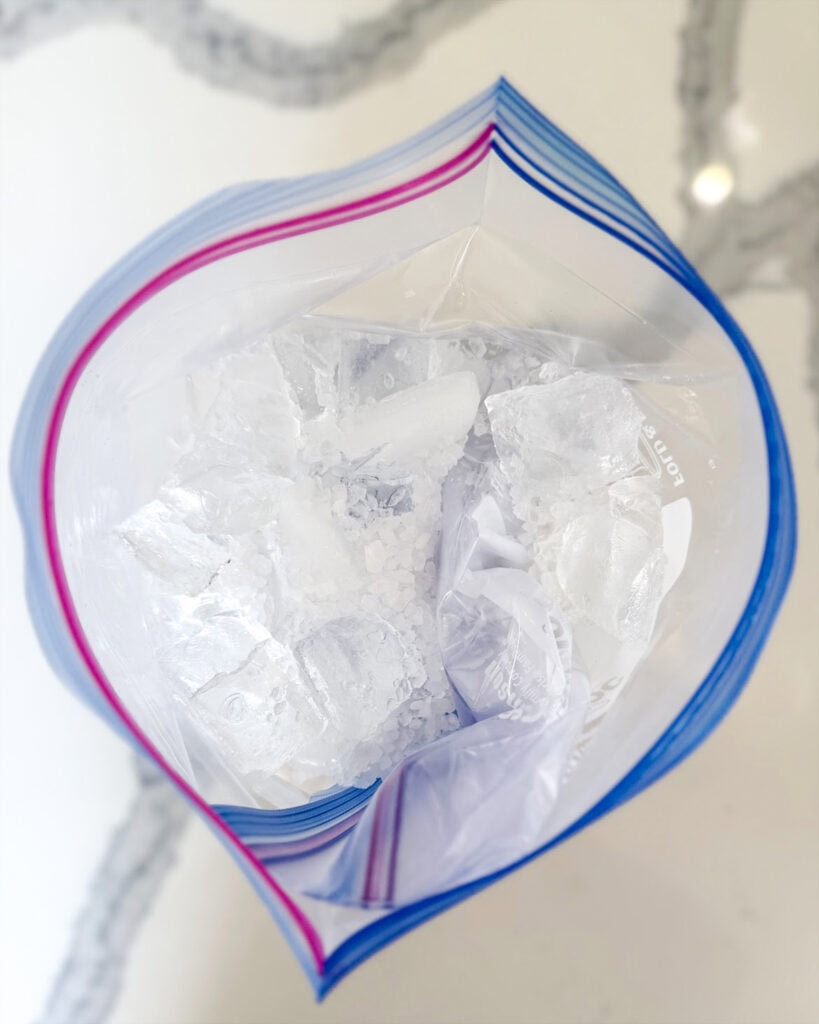
Step 2: Add the Ice and Salt. Place the bag into another bag and add in the ice and rock salt. Seal the large bag closed.
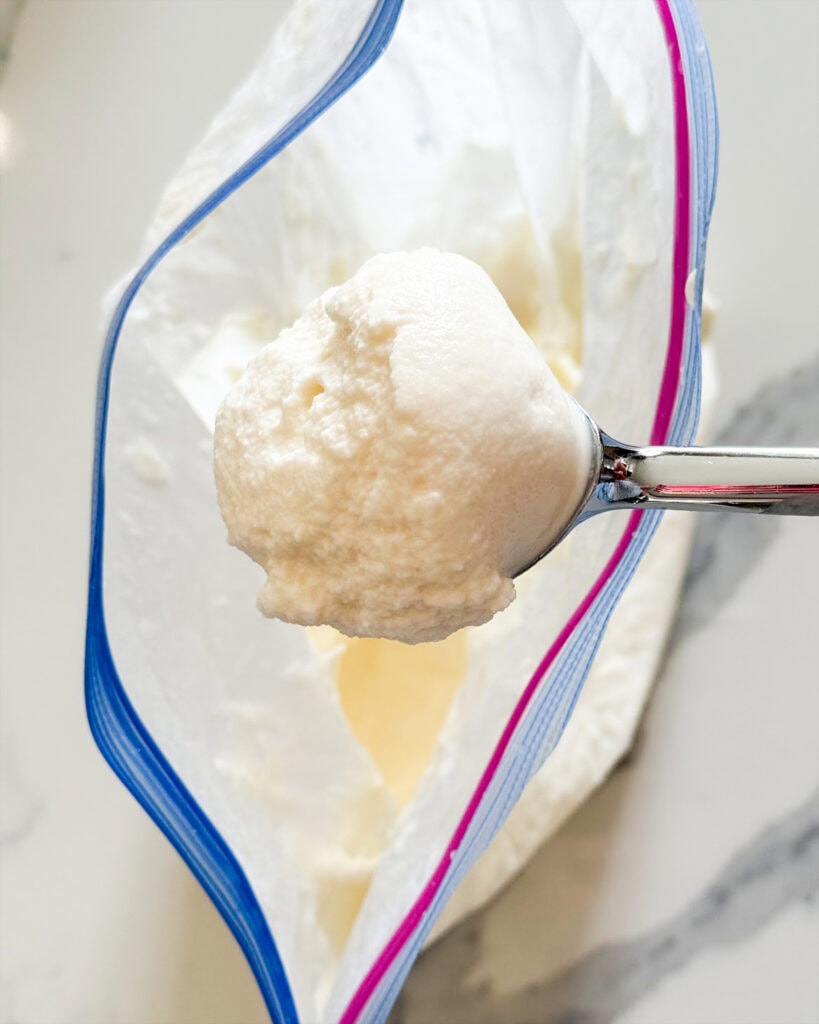
Step 3: Shake it. Shake it until the ice cream mixture starts to thicken up. Pass the bag around a circle so everyone can take turns shaking it and no ones hands get too cold. After about 12 to 15 minutes the ice cream should be the consistency of soft serve. You can eat it right out of the bag, or scoop it into bowls. If you want your ice cream to be a little more solid, scoop it into a freezer safe container and freeze it for about 3 hours.
Tips and Tricks:
- Double Bag for Leaks: Seal the ice cream mixture in two bags if you’re worried about it leaking. If you have extra rambunctious kids that will be tossing the ice cream around, this will be a good idea to keep it sealed and safe.
- Use a Towel or Gloves: The ice cream mixture gets cold fast so shake it in a towel to keep your hands warm.
- Add Mix Ins: Add chopped Oreos, mini m&ms, or other mix ins to the ice cream mixture, then squish it around for another minute or two to get them mixed evenly into the ice cream.
- Freeze Longer: Scoop the creamy ice cream mixture into a freezer safe container and freeze for another 3 to 4 hours if you want an extra thick, more scoopable consistency, ice cream. This takes away the instant enjoyment of eating it right away, but will make the ice cream more like a carton from the store.

Storage Instructions
This ice cream is best enjoyed within the first day. If you do need to save it, transfer it into a freezer safe container and freeze for up to 4 days. It will harden a lot in the freezer, so let it sit at room temperature for a few minutes before scooping to enjoy.

This homemade ice cream in a bag is a fun, easy, and super rewarding recipe. It’s a great way to get kids involved, and make a fun sweet treat that is perfect for a summer day!
More Ice Cream Recipes
If you make this Ice Cream in a Bag Recipe please leave a comment and 🌟 rating letting me know what you think! If you post the photo on Instagram, please tag me – I’d love to see what you’re making!
Ice Cream in a Bag
Ingredients
- 2 cups half and half
- 6 TBS granulated sugar
- 1 tsp vanilla extract
- 8 cups ice
- 1/2 cup Rock Salt
Equipment
- 2 Heavy Duty Gallon Sized Zip-Top Bags
Instructions
- Add the half and half, sugar, and vanilla to one of the ziplock bags. Squeeze as much of the air out of the bag, and seal tightly. 2 cups half and half, 6 TBS granulated sugar, 1 tsp vanilla extract
- Add the ice and salt to another bag and place in the ice cream bag. Seal the bag shut. 8 cups ice, 1/2 cup Rock Salt
- Shake the bag for several minutes (about 12-20) until the ice cream mixture thickens up into a soft serve consistency.
- Open the large bag and remove the bag with the ice cream. Wipe the edges so there are no salty remnants. Open it up and dig in.
Notes
- Double Bag for Leaks: Seal the ice cream mixture in two bags if you’re worried about it leaking. If you have extra rambunctious kids that will be tossing the ice cream around, this will be a good idea to keep it sealed and safe.
- Use a Towel or Gloves: The ice cream mixture gets cold fast so shake it in a towel to keep your hands warm.
- Add Mix Ins: Add chopped Oreos, mini m&ms, or other mix ins to the ice cream mixture, then squish it around for another minute or two to get them mixed evenly into the ice cream.
- Freeze Longer: Scoop the creamy ice cream mixture into a freezer safe container and freeze for another 3 to 4 hours if you want an extra thick, more scoopable consistency, ice cream. This takes away the instant enjoyment of eating it right away, but will make the ice cream more like a carton from the store.


Diane says
Have u seen the sodium count in this home made vanilla ice cream?
Whew 14,244 mg is tremendously unhealthy especially when a scope of store bought vanilla is only 50 mg. I know there are a lot of foods we should not eat a lot of but this recipe is one that is really bad & unhealthy for anyone even for just one time. I would definitely stay clear & not even try it though the picture looks delicious.
Aimee says
Did you see that you mix the ice cream in a bag surrounded by 1/2 cup of rock salt. You are not eating that rock salt. I have an auto calculator for the recipe ingredients that added it because it is a necessary ingredient, but you are not eating it. I edited the amounts to remove that. It is about 74 mg for a serving which is about the same as a serving of Haagen Dazs vanilla ice cream